Choosing a new water sport isn’t about finding the “easiest” one, but about correctly matching the sport’s specific physical demands to your current fitness.
- Your success depends on understanding a sport’s requirements for stability (core strength), power (upper body), and endurance.
- Environmental factors like wind and water conditions often pose a greater challenge than the sport’s technique itself.
Recommendation: First, honestly assess your core stability and comfort with uneven surfaces, then use this guide to find a sport that aligns with that base, rather than one that sounds the most exciting.
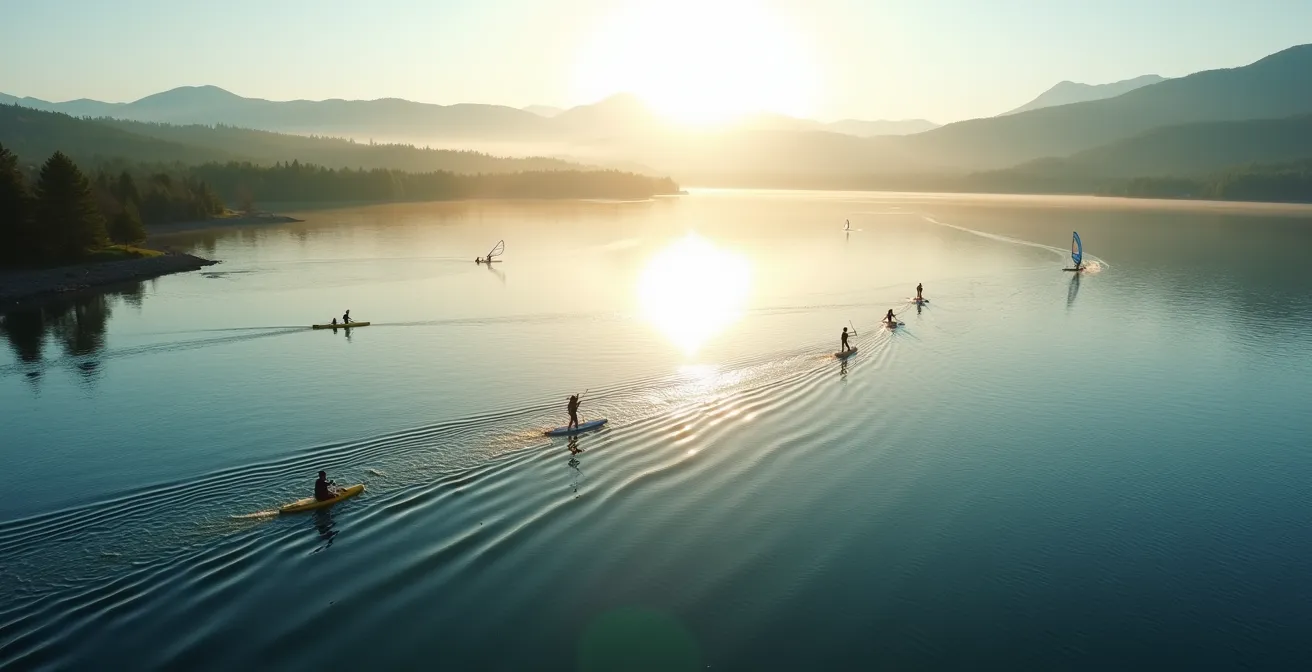
The promise of an active holiday, gliding across the water under a clear sky, is incredibly appealing. Yet for many, the moment of choice is filled with anxiety. “What if I pick something too hard?” “What if I can’t even stand up?” “Is this actually safe?” This fear of failure or injury can paralyze you into staying on the shore, missing out on the very experiences you came for. You see others effortlessly paddleboarding or windsurfing and assume they possess some innate talent or a high level of fitness you lack.
The common advice is to “start with kayaking or stand-up paddleboarding (SUP) because they’re easy.” While not entirely wrong, this oversimplification is a trap. It ignores the fundamental reason people struggle: a mismatch between their physical readiness and the specific demands of the sport and, just as importantly, the environment. The real key to learning a new water sport successfully isn’t about choosing an “easy” activity, but about understanding its unique physical mechanics and the environmental intelligence it requires.
This guide moves beyond generic advice. As a certified instructor, I’ll provide you with a framework to analyze your own fitness and match it to the right activity. We won’t just talk about what’s “hard” or “easy”; we’ll break down *why*. We’ll explore the critical role of equipment, demystify learning curves, and teach you how to read the water and weather like a pro. By the end, you’ll be able to step up to the water’s edge not with apprehension, but with the confidence that you’ve made the perfect choice for your body and your goals.
This comprehensive guide is structured to walk you through every consideration, from the administrative fine print to the on-the-water realities. Explore the sections below to build your confidence and make an informed decision for your next adventure.
Summary: A Fitness-First Approach to Water Sports
- Does Your Travel Insurance Cover Paddleboard Accidents in France?
- Campsite Rental vs Surf School: Where to Get the Best Gear for Your Money?
- How Many Lessons Does It Take to Stand Up on a Windsurf Board?
- Red Flag vs Orange Flag: What Do They Really Mean for Kayakers?
- Morning or Evening: When Is the Lake Surface Glassy for SUP?
- The Rip Current Danger: What Every Swimmer Must Know Before Entering the Atlantic
- Canoe or Kayak: Which Vessel Is Safer for a Family of 4 on the Dordogne River?
- Is Canyoning in the Verdon Gorge Suitable for Beginners or Just Experts?
Does Your Travel Insurance Cover Paddleboard Accidents in France?
Before you even touch the water, the most critical safety check is administrative. We often assume our standard travel insurance has us covered, but water sports can fall into a grey area. Policies frequently categorize activities, and what seems like a casual paddle to you might be classified as a “high-risk” exclusion by your provider. The financial consequences of an accident without proper coverage can be severe, a reality underscored by statistics from analogous activities. For instance, the 137,000 winter sports accidents in France during the 2023/2024 season that required insurance claims highlight the immense costs associated with rescue and medical care in outdoor pursuits.
The term “France” in the title is a specific example, but the principle is universal. Whether you’re on a French river or a Thai beach, you must confirm your coverage. The key is to be proactive and ask your provider pointed questions before you leave home. Don’t wait until you’re at the rental shack to discover your policy has major gaps. A simple fall could lead to a sprain, but it could also require a water rescue, and you need to know if “Search and Rescue” is included. Below are the essential questions you must ask your insurance company.
- Is stand-up paddleboarding (SUP) categorized as a standard activity or a high-risk exclusion in my policy?
- Are accidents during professionally guided tours covered by the operator’s liability, or does my personal policy need to cover it?
- Does my policy include Search and Rescue coverage for water-based emergencies?
- Is equipment damage or loss covered in case of an accident, especially for expensive rentals?
- What specific documentation (e.g., police report, medical certificate) do I need to support a water sports-related claim?
Getting clarity on these points is the foundation of a safe and stress-free experience. It transforms risk from an unknown fear into a managed variable, allowing you to focus on the fun.
Campsite Rental vs Surf School: Where to Get the Best Gear for Your Money?
Once your insurance is sorted, your next major decision is equipment. This is where many beginners make their first critical mistake, often leading to a frustrating and discouraging experience. The choice between a cheap campsite rental and a professional surf school is not just about price; it’s about the quality, safety, and suitability of the gear. A common issue I see is a gear-to-condition mismatch: a family trying to use a basic, flexible rental paddleboard in choppy coastal water, which is a recipe for failure. The board isn’t designed for it, making it unstable and nearly impossible for a novice to balance on.
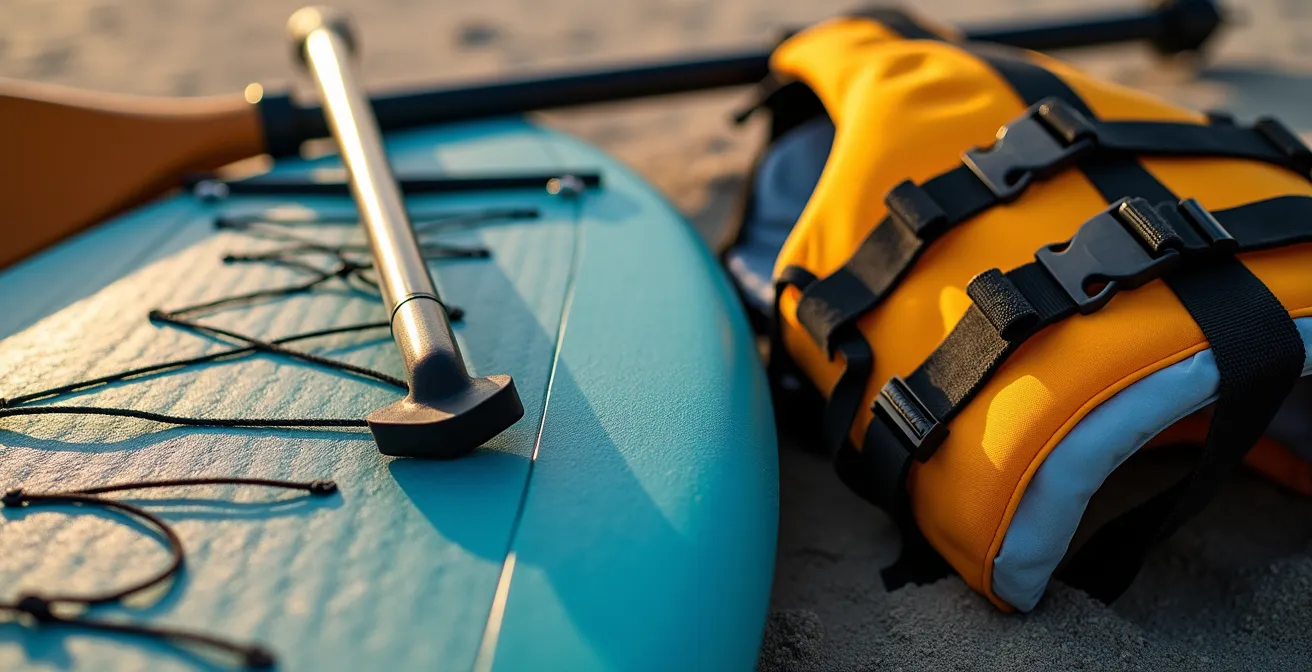
Professional schools invest in high-quality, rigid boards and gear suited for various conditions and body types. Their equipment is regularly inspected for safety, and most importantly, they size it correctly for your height and weight. This proper fitting is a game-changer for stability and control. A campsite rental might be cheaper per hour, but that saving is worthless if the gear makes the sport ten times harder to learn. The following table breaks down the crucial differences.
| Factor | Campsite Rental | Surf School |
|---|---|---|
| Cost | €15-25/hour | €35-50/hour |
| Equipment Quality | Basic/Variable | Professional Grade |
| Safety Inspection | Self-check required | Pre-inspected |
| Size Fitting | Limited options | Properly sized for weight/height |
| Local Knowledge | Not included | Expert advice included |
| Best For | 1-hour calm lake paddle | Learning in waves/wind |
Ultimately, paying a bit more at a proper school is an investment in your learning curve and safety. You’re not just renting a board; you’re renting a higher chance of success and enjoyment.
How Many Lessons Does It Take to Stand Up on a Windsurf Board?
Windsurfing often carries a reputation for being one of the most difficult water sports to learn, scaring off many potential enthusiasts. The question “how long does it take?” is common, but the answer is more encouraging than you might think. The key is understanding the learning progression. It’s not a simple pass/fail of standing up; it’s a series of manageable skill milestones. With professional instruction and the right beginner equipment (a large, stable board and a small, light sail), the initial learning curve is surprisingly fast. In fact, an official school in the US states that most beginners can sail short distances within a single 3-hour session.
The goal of your first lesson isn’t to be carving graceful turns in high winds. It’s to grasp the basic physical mechanics: how to use your body weight to steer, how to manage the sail’s power, and how to maintain a stable stance. Falling is an expected and essential part of this process. An instructor will teach you how to fall safely and, more importantly, how to get back on the board efficiently. This demystifies the process and builds confidence rapidly.
Windsurfing Learning Progression Timeline
A typical 2-hour beginner lesson follows a structured progression. The first 30 minutes are often spent on a land simulator and then in the water, practicing how to raise the sail, find your balance, and get moving in a straight line. The next hour is dedicated to steering, turning, and stopping, with falls being a frequent but constructive part of the learning process. The final 30 minutes focus on refining these techniques through speed control adjustments and mastering basic turns with direct instructor feedback, cementing the core skills needed to practice independently.
So, while mastering windsurfing takes years, the initial success of standing up and sailing is achievable within your first afternoon. It’s a sport that rewards technique over brute force, making it accessible to anyone with a willingness to learn the fundamentals.
Red Flag vs Orange Flag: What Do They Really Mean for Kayakers?
Official warning flags on a beach or lake are a critical safety system, but they provide a very general overview of conditions. For a kayaker or paddleboarder, relying solely on a green, orange, or red flag is insufficient. You need to develop what I call Environmental IQ—the ability to read the subtle but crucial signs of the water and wind yourself. An orange flag might mean “dangerous bathing,” but for a kayaker in a stable, closed-cockpit sea kayak, the conditions might be perfectly manageable, even fun. Conversely, for a beginner on a sit-on-top kayak, that same orange flag could signal a serious risk of being blown offshore.
Your vessel type and skill level completely change the meaning of the flag. Instead of a simple “go” or “no-go,” you should use the flag as a prompt to conduct a more detailed personal risk assessment. Look beyond the flag and observe the environment directly. Is the wind blowing offshore or onshore? An offshore wind is far more dangerous, as it can push you out to sea with surprising speed. What is the water’s texture? Are you seeing isolated, light ripples (“cat’s paws”) or a field of consistent, white-capping chop? The latter indicates stronger, more sustained wind and will be far more challenging to paddle against.
Building your Environmental IQ involves a checklist of personal observations:
- Wind Speed and Chop: An orange flag often signals increased wind. This may create manageable chop for a closed-cockpit kayak but could be very challenging and wet for an open-top kayak.
- Wind Direction: This is paramount. Assess the wind’s direction to avoid a situation where you are easily blown away from the shore, making your return trip a difficult battle.
- Unofficial Local Signs: Nature provides its own warnings. Look for birds huddling on the shore instead of flying, or a complete absence of other boats on the water. These are often signs that experienced locals know something you don’t.
- The ‘Point of No Return’ Rule: A golden rule for any paddler is to never paddle further away from shore than you would be comfortable swimming back.
- Water Texture: Learn to monitor changes in the water surface. A shift from light ripples to a pattern of consistent chop indicates that the wind is building, and conditions are changing.
Treat the official flags as the start of your safety check, not the end of it. True water safety comes from combining official warnings with your own informed judgment and observation.
Morning or Evening: When Is the Lake Surface Glassy for SUP?
For sports that rely heavily on balance, like stand-up paddleboarding (SUP) or water skiing, the single most important environmental factor is the water surface. A calm, glassy surface makes learning exponentially easier, while even a small amount of chop can feel like trying to balance on a moving floor. Many beginners get discouraged simply because they try to learn at the wrong time of day. The key is to understand and exploit predictable thermal wind cycles that govern most lakes.
In the morning, before the sun has had a chance to significantly heat the surrounding land, the air is typically still. This results in calm, glassy water, offering the perfect window for a beginner’s first session. As the day progresses, the land heats up faster than the water, causing warmer air to rise. Cooler, denser air from over the lake then moves in to replace it, creating an onshore wind. This wind builds throughout the midday and early afternoon, creating the chop that makes balancing so difficult.
However, there’s a second magic window. As the sun sets, the land cools down faster than the water. This temperature difference diminishes, the wind dies down, and the lake can return to a glassy state in what is often called the “glass-off” period. While this evening session can be beautiful, it comes with a crucial caveat: the air and water temperatures are dropping. If you fall in far from shore, the risk of hypothermia increases. Therefore, morning sessions are generally the safest bet for beginners practicing new skills.
Your Checklist for Finding Glassy Water
- Target dawn and the first few hours after sunrise for the most consistently calm water conditions.
- Study a map of the lake’s topography to identify coves or bays that are naturally sheltered from the prevailing wind direction.
- Learn to visually differentiate between “cat’s paws” (small, isolated ripples indicating light, manageable gusts) and consistent chop (a sign of sustained wind).
- Observe the daily thermal wind pattern: calm at dawn, building through midday, and potentially calming again around dusk.
- If planning an evening session, factor in the temperature drop and stay closer to shore than you would in the morning to mitigate hypothermia risk.
Don’t fight the elements. By understanding the daily rhythm of the lake, you can work with nature to give yourself the best possible learning environment.
The Rip Current Danger: What Every Swimmer Must Know Before Entering the Atlantic
While we’ve focused on sports, perhaps the most universal water risk, especially on ocean coastlines, is the rip current. These powerful, narrow channels of water moving away from the shore can quickly pull even the strongest swimmers out to sea. Understanding the risk-to-skill ratio is paramount here. No matter how fit you are, if you don’t have the specific skill to identify and escape a rip current, you are at high risk. Panic is the real enemy, as it causes swimmers to exhaust themselves by trying to swim directly against the current, a battle you will always lose.
The first skill is identification from the shore, before you even get in. A rip current often looks different from the surrounding water. It can appear as a calmer, flatter patch of water in an area of breaking waves, or it might be a channel of churning, discolored water where sand and sediment are being pulled offshore. Learning to spot these signs is your first and best line of defense. Never enter the water near a pier, jetty, or groin, as these structures often create permanent rip currents along their sides.
If you do get caught in one, the strategy is counter-intuitive but life-saving. You must fight the instinct to swim back to shore.
- Stay Calm and Float: The most important step. Don’t panic. The rip will not pull you under, only away from the shore. Float on your back to conserve precious energy.
- Swim Parallel to Shore: Once you’ve composed yourself, begin swimming parallel to the coastline. Most rip currents are relatively narrow, often less than 100 feet wide. By swimming sideways, you will eventually exit the ‘neck’ of the current and find yourself in water where you can make progress back to shore.
- Signal for Help: If you are not a confident swimmer or are becoming tired, stay floating and signal for help by waving your arms and shouting. Conserve your energy rather than attempting a swim you cannot complete.
Mastering this simple safety protocol transforms a potentially deadly situation into a manageable one. It’s a skill that has nothing to do with fitness and everything to do with knowledge and calm execution.
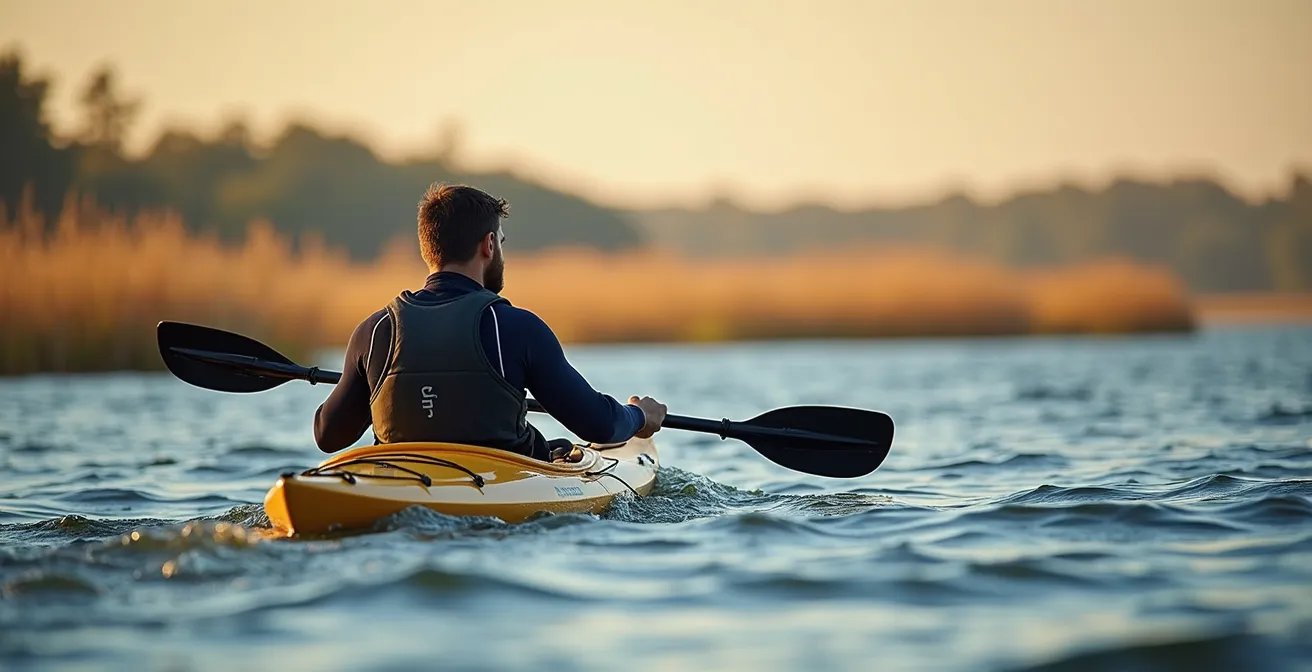
Canoe or Kayak: Which Vessel Is Safer for a Family of 4 on the Dordogne River?
For families, the choice often boils down to canoeing or kayaking, typically seen as the most accessible entry points to water sports. While both are excellent options, the “safer” choice depends on your family’s makeup, especially the age of your children, and the type of vessel you choose. The traditional open-top canoe can fit a whole family and lots of gear, which seems ideal. However, its high sides give it a higher center of gravity, making it feel “tippy” and less stable, especially for beginners. If it capsizes, it becomes a massive, water-filled tub that is extremely difficult to right and re-enter, a serious safety concern with small children.
Sit-on-top kayaks, on the other hand, offer a distinct safety advantage. Their lower seating position provides inherent stability. More importantly, they are self-bailing and easy to re-board from the water. This “self-rescue” capability is a massive plus for families. If a child falls off or the kayak tips, getting them back on is a relatively simple process. For a family of four, using two tandem sit-on-top kayaks often provides a safer and more flexible setup than one large canoe. It also allows older children to participate more actively in paddling. According to U.S. Coast Guard guidance, children between 2 and 5 are at a suitable age to start kayaking as passengers, provided they are wearing a properly fitted life jacket.
As one expert guide notes, this ease of re-entry is a primary safety consideration. As noted by Virginia Water Trails in their guide on kayaking with children:
In general, I feel safer if my child is in a sit-on-top kayak, rather than a sit-in. If he falls out, or the kayak tips over, it’s a lot easier to get back into a sit-on-top kayak.
– Virginia Water Trails, Virginia Water Trails – Kayaking With Kids Guide
The following table summarizes the key safety trade-offs for a family context:
| Safety Factor | Canoe | Kayak (Sit-on-Top) |
|---|---|---|
| Stability | Higher center of gravity, feels tippy initially | Lower seating position, inherently more stable |
| Self-Rescue | Very difficult to bail and re-enter if swamped | Easy to re-board after capsize |
| Family Capacity | Can fit entire family plus gear | Two tandem kayaks offer flexibility |
| Maneuverability | More cumbersome with full load | Better control in tandems |
| Storage Needs | Up to 5m length requires significant space | Smaller, easier to transport and store |
For most families with young children on a calm river like the Dordogne, a pair of tandem sit-on-top kayaks represents the safer, more stable, and more manageable choice.
Key Takeaways
- Your success in a new water sport is determined by matching your physical abilities (especially core stability) to the sport’s demands, not by picking an “easy” sport.
- High-quality, properly fitted gear from a professional school is a crucial investment that can make learning significantly easier and safer than using cheap rentals.
- Developing “Environmental IQ”—the ability to read wind, water texture, and currents—is often more important for safety and enjoyment than pure physical fitness.
Is Canyoning in the Verdon Gorge Suitable for Beginners or Just Experts?
Finally, we arrive at sports like canyoning, which blend hiking, swimming, jumping, and rappelling. It can seem like the exclusive domain of experts, especially in dramatic locations like the Verdon Gorge. However, many guided canyoning trips are specifically designed for beginners. The critical factor is not your prior canyoning experience but your honest self-assessment of a few fundamental capabilities. Canyoning is a test of your all-around fitness and nerve, and your suitability depends on your answers to some basic questions.
Are you a confident swimmer? Can you handle heights? Do you have the endurance for a few hours of hiking on uneven terrain? These are the building blocks. A good guiding company will never force you to do something you’re uncomfortable with; jumps and slides are almost always optional, with walk-around paths available. The guide’s job is to manage the technical aspects like ropes and safety systems. Your job is to bring a baseline of fitness and a willingness to follow instructions precisely. The risk-to-skill ratio is managed by the guide’s expertise, but you must bring the prerequisite physical ability.
Before booking any “beginner” trip, you should perform a self-assessment and vet the provider thoroughly. A professional operation will be transparent about the physical requirements and their safety procedures. This final checklist is your tool to determine if you’re ready for the challenge.
- Swimming: Can you comfortably swim 50 meters unassisted in open water?
- Heights: Are you comfortable with heights, such as standing on a 3-meter (10-foot) diving board?
- Endurance: Can you hike for 2-3 hours on uneven, rocky trails without becoming exhausted?
- Provider Questions: Ask the company if all jumps and slides are optional. There should be no pressure.
- Group Size: Verify the maximum group size per guide. A smaller ratio (e.g., 8:1) is significantly safer.
- Exit Strategy: Confirm if there are designated escape routes along the canyon if someone needs to stop partway through.
By honestly evaluating your fitness and choosing a reputable guide, adventure sports like canyoning can be an incredibly rewarding and accessible experience, marking the pinnacle of an active holiday.